Mini Cement Fire Pit
[image_with_caption text=”Blossom” image=”https://itsblossom.com/wp-content/uploads/2018/09/BLM1004_Cement-2.0-V5.mp4.00_00_45_15.Still001.jpg”]
Materials:
- large metal bowl
- Vaseline
- medium metal bowl
- cement mix
- metal can
- lighter fluid
- wire mesh
- black gems
Instructions:
- Coat the inside of the large metal bowl with a good amount of Vaseline.
- Pour in the wet cement mix and give the bowl a few taps to release any air bubbles.
- Press the medium metal bowl into the wet cement and place a few rocks in the bowl to keep it in place in the cement. Let the cement set.
- Wiggle the medium bowl to help loosen it from the cement and remove it.
- Push on the side of the large metal bowl to help pull it away from the cement and lift out the cement bowl.
- Place a metal can filled with lighter fluid in the base of the cement bowl.
- Place a wire mesh over the cement bowl.
- Pour black gems over the mesh until it’s completely covered.
- Use a lighter to light the fire pit.
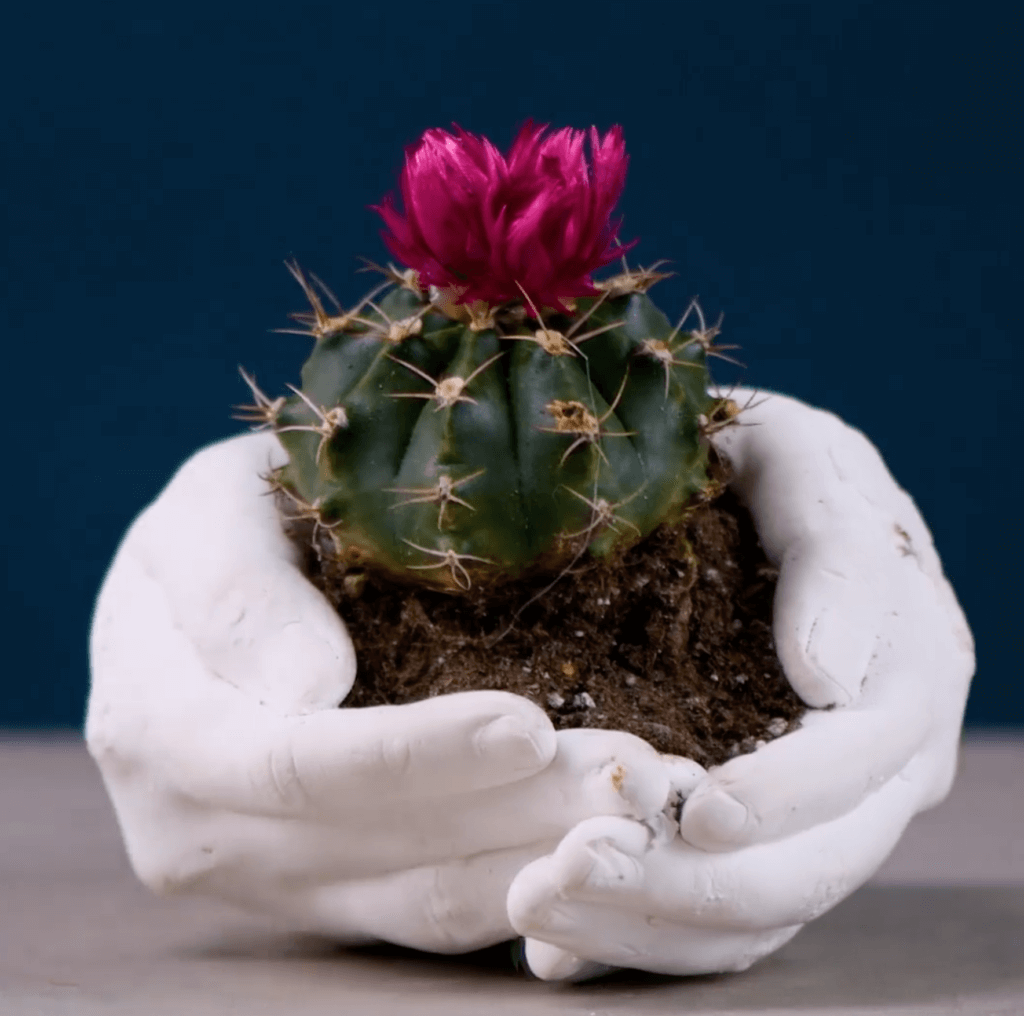
Cement Hands
[image_with_caption text=”Blossom” image=”https://itsblossom.com/wp-content/uploads/2018/09/Screen-Shot-2018-09-21-at-7.23.26-PM.png”]
Materials:
- buckets
- molding mix
- water
- wooden dowel (to stir with)
- your hands!
- cement mix
- knife
Instructions:
- Pour in the molding mix and amount of water specified by the brand of molding mix you’re using.
- Use a wooden dowel (or its equivalent) to stir the water and molding mix until you’re left with a purple goo.
- Insert your hands in any pose you want into the purple goo and wait two minutes for it to set.
- Carefully remove your hand(s) after it’s completely set.
- Pour in the premade cement mix. Tap the bucket to release the air bubbles before you leave it to set for 24 hours.
- Flip the bucket over to remove the solidified molding mix from it.
- Use a sharp knife to carve away the molding mix. You can start to peel away from the molding mix with your hands once you get close to the cement to avoid accidentally scratching it.
- Brush off any remaining molding mix or dust before using the cement hands.
Cement Dish Towel Planters
[image_with_caption text=”Blossom” image=”https://itsblossom.com/wp-content/uploads/2018/09/BLM1004_Cement-2.0-V5.mp4.00_02_04_02.Still003.jpg”]
Materials:
- bucket
- cement mix
- water
- latex gloves
- wooden dowel (to stir)
- old dish towel
- something tall and cylindrical (to rest the towel on and that you don’t mind getting wet cement on)
Instructions:
- Pour the cement powder into the bucket and pour the specified amount of water indicated by the brand of cement mix you’re using.
- Make sure you’re wearing gloves when you submerge the old dish towel into the wet cement mixture.
- Ring out some of the wet cement from the towel before you hang it to dry over the cylindrical mold you’re working with.
- Once dry, add some potting soil and any flowers to the planter.
Cement Key Chains
[image_with_caption text=”Blossom” image=”https://itsblossom.com/wp-content/uploads/2018/09/BLM1004_Cement-2.0-V5.mp4.00_02_22_15.Still004.jpg”]
Materials:
- silicone ice cube tray with fun shapes
- keychains
- cement mix
Instructions:
- Place one keychain per mold in the ice cube tray with the dangling chain bit sticking in the molds.
- Pour in the wet cement mix and let it set until it’s completely dry.
- Pop out each cement keychain and feel free to paint or decorate them however you’d like.
Cement Garden Light
[image_with_caption text=”Blossom” image=”https://itsblossom.com/wp-content/uploads/2018/09/BLM1004_Cement-2.0-V5.mp4.00_03_30_24.Still005.jpg”]
Materials:
- mason jar
- hot glue gun
- metal bowl
- vaseline
- cement mix
- sandpaper
- light
Instructions:
- Pipe hot glue around the rim of a mason jar.
- Flip the mason jar glue side down into a metal bowl and let it dry. In the meantime mix your cement with water.
- Coat the inside of the bowl with a decent amount of vaseline to prevent the cement from sticking to the bowl.
- Give the bowl a tap on the table to release any air bubbles and allow it to dry.
- Once dry, carefully remove the cement from the metal bowl.
- You should still have a good amount of vaseline left in the bowl, but if yours is looking a little dry add some more for good measure.
- Pour more cement mix back into the bowl. Stick the mason jar with the already dried cement back into the bowl with the clean side of the mason jar going into the fresh cement.
- Give the bowl a tap on the table to release any air bubbles and allow it to dry.
- Remove the dried cement from the bowl and sand down any rough edges with sandpaper or a sanding block.
- Place a light bulb or tea light inside the mason jar.


