[video_quote pvideo=”” video=”xoQMmxZr” text=”Feel like Royalty With These Crafts and Snacks Inspired by Disenchanted”]
Are you as excited for Disenchanted as we are? I mean, who isn’t? We can’t wait to see what Giselle, Robert, and their crew are up to 10 years after the fated events of Enchanted. Are they adjusting to modern life, or is Giselle as magical and whimsical as usual? What challenges are they facing, and who will be the new villain of their story?
Well, wherever or whoever you watch Disenchanted with—whether it’s with friends, family, or by your lonesome—these magical party decorations and snacks will have you feeling like Giselle herself! With the beautiful Clocktower Centerpiece and cute and delicious Stained Glass Cookies, your watch party will be complete with these easy princess snacks and crafts!
If you want to catch up with Giselle and her friends, check out them in their latest movie, Disenchanted. Streaming on November 18th at Disney+, it is a sequel you definitely do not want to miss!

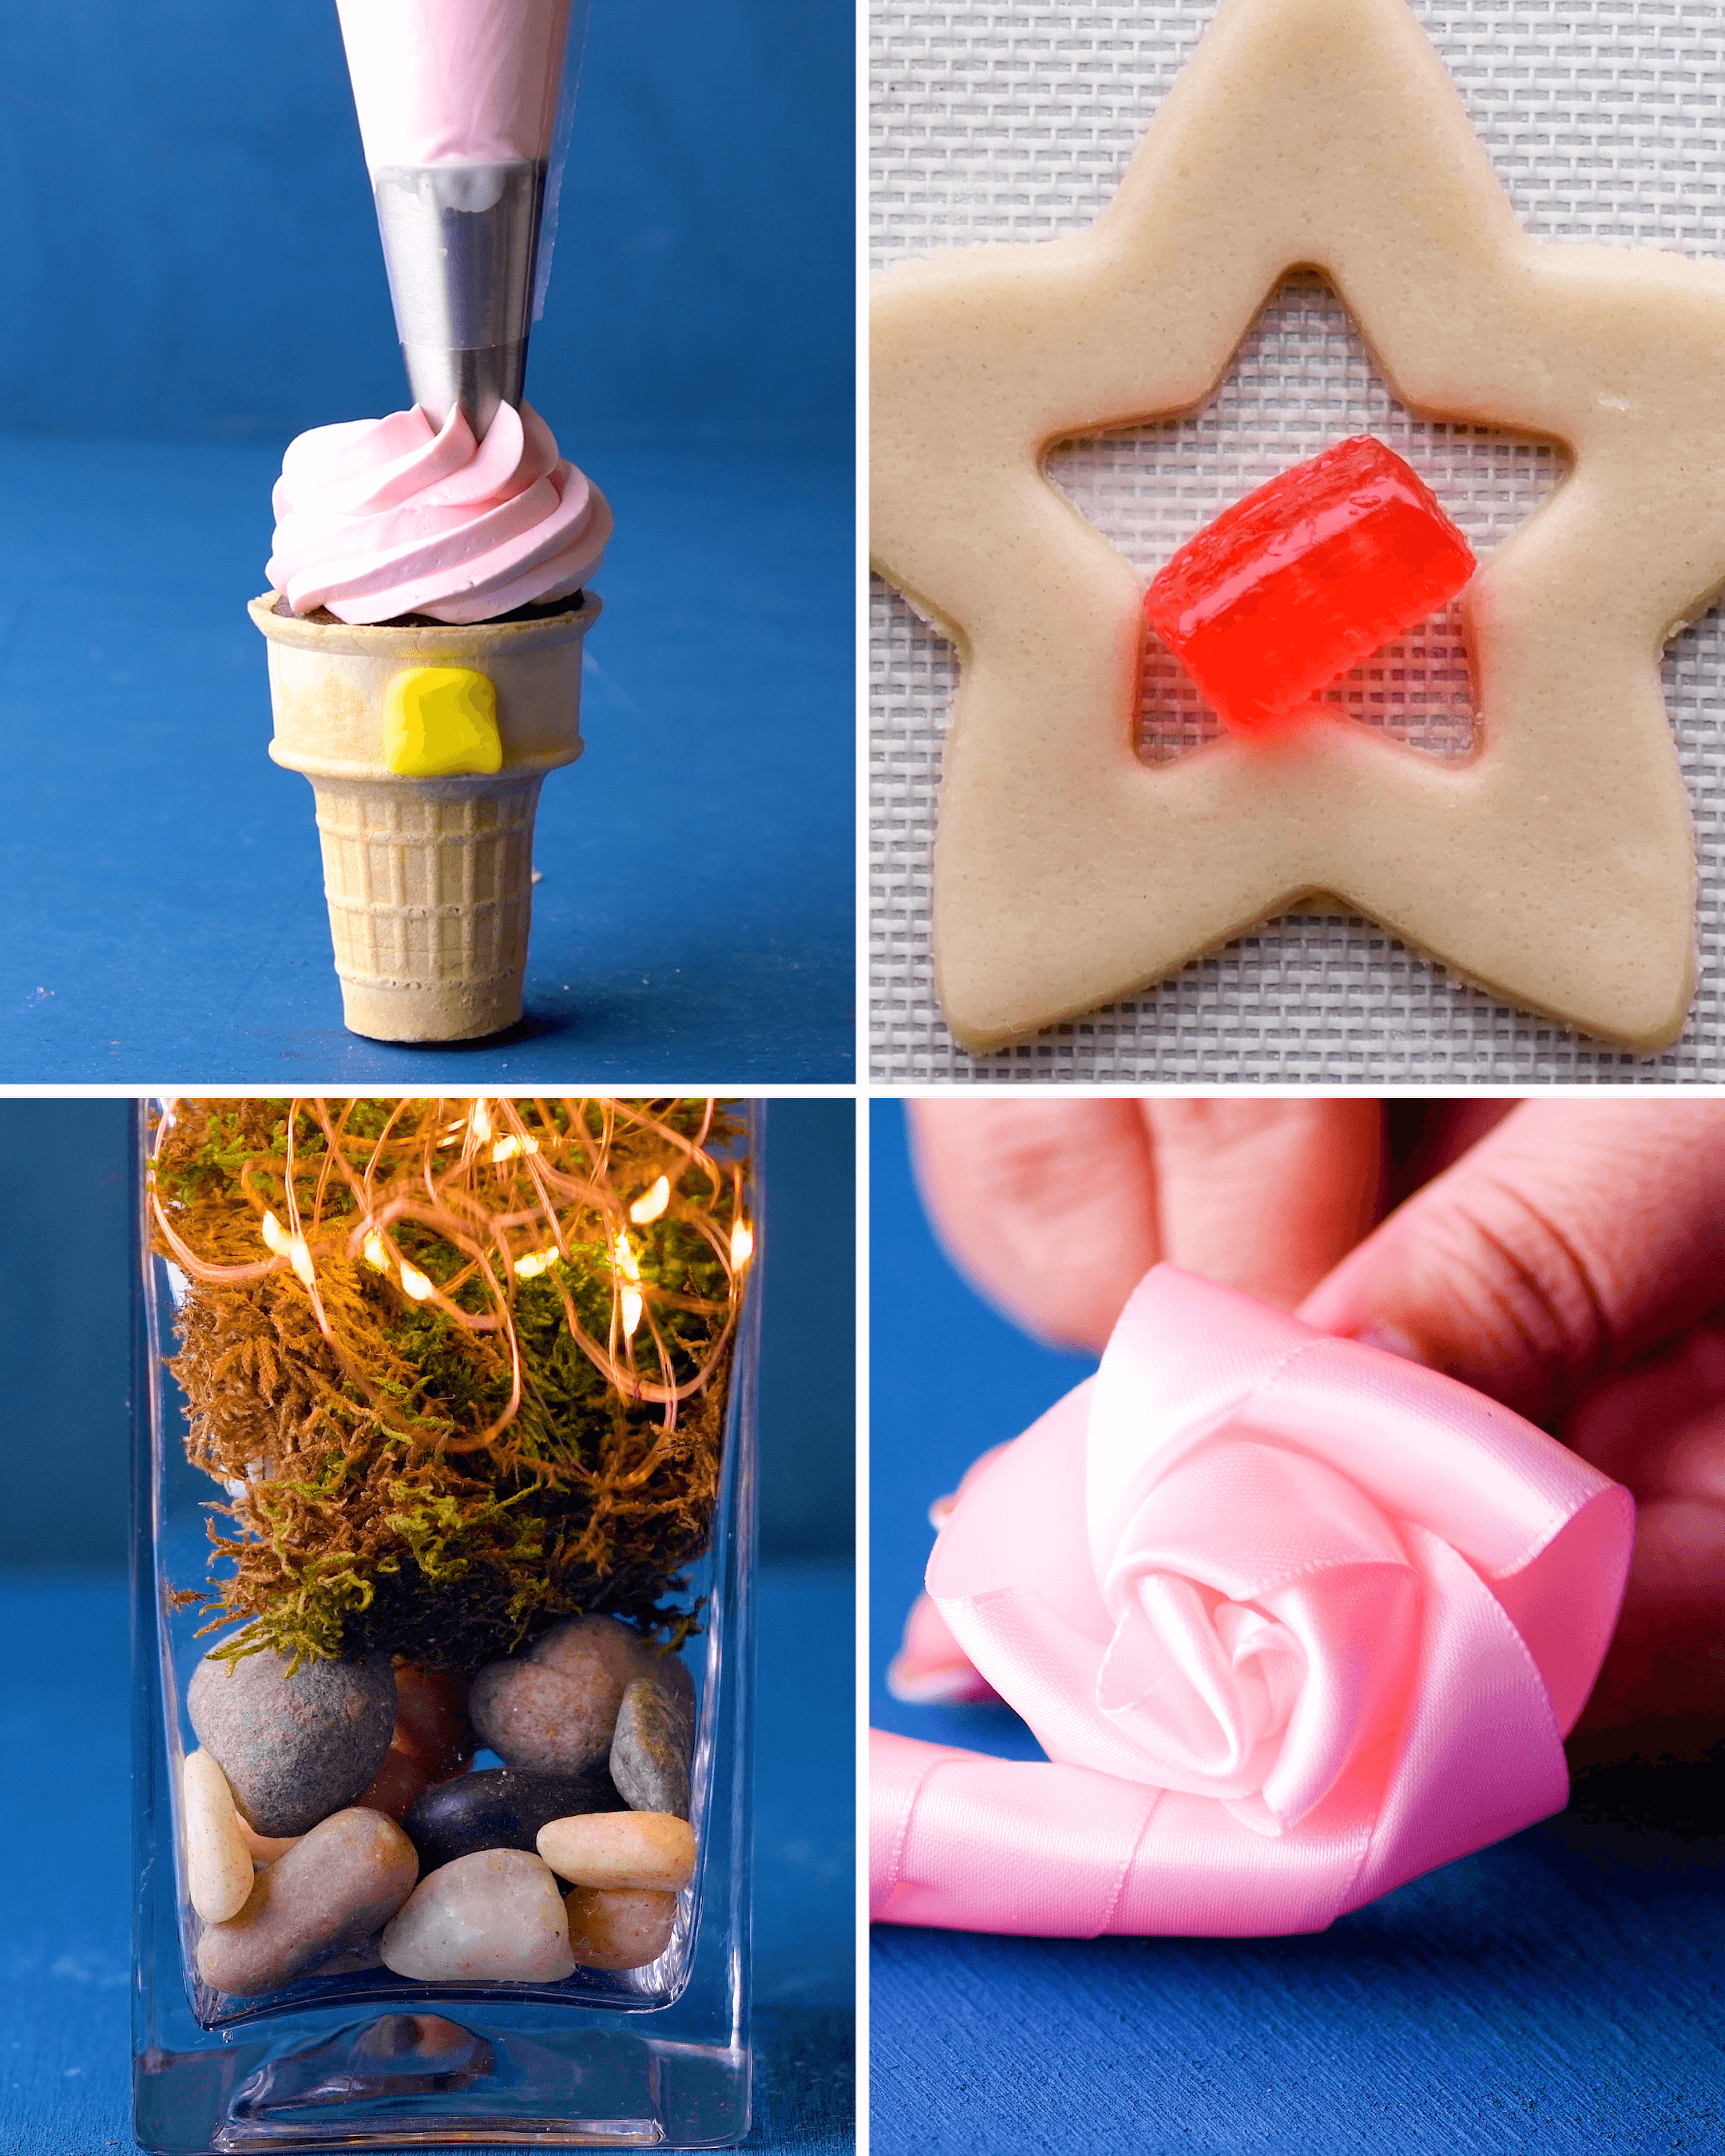
Clocktower Centerpiece
Clocktower Centerpiece
Ingredients:
- Square Vase
- Tall Rectangular Vase
- Empty 2 Liter Bottle
- Cardboard
- Hot Glue Gun & Glue Sticks
- Scissors
- Brown Spray Paint
- Fairy Lights
- Moss
- Rocks
- Clocktower Print Out
Directions:
- Take a 1/2″ cardboard strip about 15″ long, create a pointed arch, and hot glue to top of 2 liter bottle.
- Take another 1/2″ cardboard strip and insert under the pointed arch. Hot glue down. Insert 2 more cardboard strips crisscrossing to create a base for the top of the tower. Trim off excess cardboard to even out.
- Take strips of a cardboard and cut notches (almost to the top of the cardboard strip) to create shingles and wrap around the cardboard arch. Hot gluing the strips down along the way. Repeat until the whole arch is covered.
- Cut off top of tower from the rest of the bottle. Paint and set aside for later.
- Put rocks, moss, and fairy lights in rectangular vase.
- Take the clocktower print out and glue to center front of square vase. (optional: use sticker paper for a see-through effect)
- Hot glue the square vase on to the top of the rectangular vase and add some fairy lights.
- Lastly, add the top of the clocktower to complete your enchanted clocktower!

Royal Jar Favors
Royal Jar Favors
Ingredients:
- Tweezers
- Ribbon (Pink & Black)
- Scissors
- Lighter
- Ruler
- Double-sided Tape
- Hot Glue Gun & Glue Sticks
- Mini Crowns
- Plastic Jars (Gold & Black Tops)
- Candy
Directions:
- Cut end of ribbon and using a lighter, melt the ends to keep from unraveling.
- Wrap the ribbon around the ruler at a diagonal.
- Add double-sided tape to bottom of the ribbon. Then remove ruler.
- Take tweezers and pinch at the bottom of the ribbon with the double-sided tape. Use the tweezers to roll the ribbon into a rose.
- Place the ribbon rose into the crown.
- Then hot glue and adhere to top of the jar.
- Add candy inside to jars.
- Voila! You have a fancy, sweet candy jar for your royal guest!

Stained Glass Cookies
Stained Glass Cookies
Difficulty: Easy • 12 Servings • Total Time: 35 Minutes
Ingredients:
- 1 roll store bought sugar cookie dough
- 1 all-purposepose flour
- 12 colorful hard candies
Directions:
- Preheat the oven to 350 degrees Fahrenheit.
- Knead flour into cookie dough. Roll into ¼” thick sheet between two sheets of parchment paper. Refrigerate for 30 minutes.
- Cut into star shapes about 4” in size. Remove excess dough. Transfer star cookies to a silicone mat lined baking sheet. Cut smaller stars about 2” in size from the large cookies, and remove the centers.
- Replace centers with colored hard candies. Bake for 12-14 minutes or until golden brown.
- Cool completely and remove from the silicone mat. Serve.

Castle Cake Cones
Castle Cake Cones
Difficulty: Medium • 12 Servings • Total Time: 1.5 Hours
Ingredients:
- 12 wafer cones
- 1 box chocolate cake mix, prepared according to box instructions
- 12 sugar cones
- 2 cups pink candy melts, melted
- 2 tbsp cup coconut oil
- 4 banana taffy candy
- 1 batch Italian meringue buttercream (refer to well cake for recipe)
Directions:
- Preheat oven to 350 degrees Fahrenheit.
- Scoop chocolate cake batter into wafer cones. Fill halfway.
- Transfer filled wafer cones to a cupcake pan. Bake for 20-25 minutes or until a toothpick inserted comes out clean. Cool completely.
- Mix melted pink candy melts with coconut oil to thin. Transfer to a tall glass for easy dipping.
- Dunk sugar cones into pink candy coating mixture until covered. Remove and place onto parchment. Allow to set completely.
- Roll banana taffy candy to ⅛” thickness (heat in microwave for 10 seconds and knead if candy is too hard). Cut with a small square cutter. Remove excess then to create rounded window effect trim top edge with a larger round cutter. Stick onto side of the wafer cone.
- Color 75% of the buttercream light pink, 25% dark pink, and 25% green. Transfer light pink cream into piping bag fitted with an open star tip. Transfer dark pink cream into piping bag fitted with a small open star tip. Transfer green cream into piping bag fitted with a small flat ruffle tip.
- Frost the top of the cupcake with a short layer of pink buttercream. Press pink sugar cone into frosting. Decorate the roof with a diagonal of green ruffles to look like vines and then pipe little stars of dark pink onto the vines to resemble flowers. Serve.